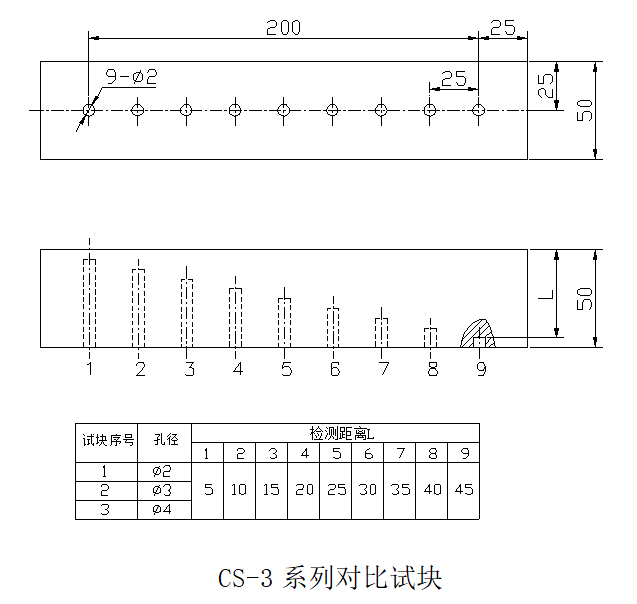
CS-3 test block is designed according to the requirements of ultrasonic testing of carbon steel and low alloy steel forgings used in pressure equipment. It is suitable for the detection of carbon steel and low alloy steel forgings with thickness less than 45mm and radial detection of carbon steel and low alloy steel bolt billets with diameter greater than or equal to M36 by twin-crystal straight probe.


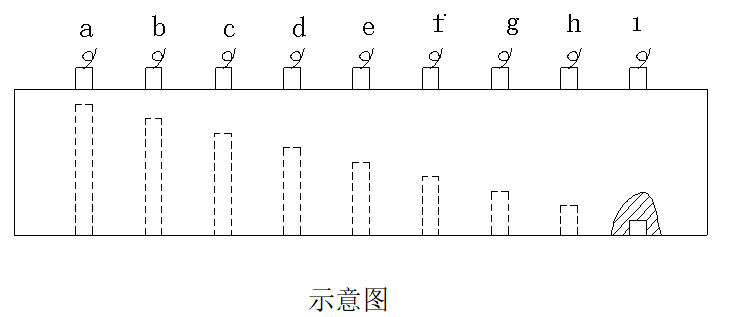
Test method: Select the appropriate test block according to the thickness of the test specimen and the standard requirements. Place the verified twin-crystal probe at the position a in the schematic diagram. Move the probe back and forth so that the direct sound beam can get the maximum reflection echo on the flat bottom hole. Adjust the echo amplitude to 80% of the height of the full screen, record the dB value at this time, which is the first point. The probe is placed at position b in the diagram, and the probe is moved back and forth so that the direct sound beam can get the maximum reflected echo on the flat bottom hole. Adjust the echo amplitude to 80% of the height of the full screen, record the dB value at this time, which is the second point. The probe is placed at position c in the diagram, and the probe is moved back and forth so that the direct sound beam can get the maximum reflected echo on the flat bottom hole. Adjust the echo amplitude to 80% of the height of the full screen, record the dB value at this time, which is the third point, and so on until the range can fully cover the detection thickness (at least three test points), and connect the above points into a curve, which is the twin-crystal straight probe distance-amplitude curve, and take this as the reference sensitivity. On this basis, a gain of 6dB is used as the scanning sensitivity.


